Saturday, July 5, 2014

the bestest, easiest, fastest kimchi yet! (UPDATED)

Tewshooz and Dani - this one's for the both of you!

this kimchi is awesome! i love it! it's super-quick and can be eaten immediately and it will still taste like kimchi. but because it's made with regular cabbage and not nappa cabbage, it is far crunchier. i don't know about you - but i love my kimchi to be crunchy!


Ingredients:

1 head of cabbage, cored
1 cup of cold water
1/4 cup of kosher salt
1/3 cup of red pepper flakes (the korean kind, not chili flakes)
1/4 cup of fish sauce
1/4 cup of crushed garlic
as much chopped green onion (or chives) as you like (i like about 1/4 cup cut into one inch pieces)
1/2 cup of carrot, julienned
1/2 cup of daikon radish, julienned (i left this out this time as i didn't have any)
1 tbspoon of sugar
rubber or surgical gloves - A MUST!
a clean, sterilized glass jar with lid

Instructions:
(i am so sorry that i didn't get pictures of the steps of the process. if anyone wants to see the actual steps, let me know and the next time i make a batch - which will be soon! i will have my husband take pics!)

1. chop the cabbage as coursely, or as finely as you wish. some people like uniformed, julienned strips whereas i prefer a much courser chop. i just cut mine into big chunks.

2. in a large non-reactive bowl (glass or ceramic), put in your cabbage, followed by the water. using your hands, rub the cabbage all through the water so that it all gets wet.

3. now add your kosher salt to the bowl and really get in there with your hands and rub the salt all through the cabbage and the water. you will feel the cabbage start to wilt almost right away.

4. now set aside your cabbage and crush enough garlic to make 1/4 of a cup. depending on the size of your clove you might use the whole clove or 2/3 of it. no matter. add the crushed garlic to another bowl in which you will make the kimchi paste. go and massage your cabbage for a bit moving all of the leaves through the water and rubbing the kosher salt on all of the leaves.

5. now add the red pepper flakes to your kimchi paste. add the fish sauce to the kimchi past. go back and massage your cabbage again.

6. add the green onion, carrot, daikon and sugar. go back and massage your cabbage again.

7. now stir your kimchi paste with a wooden spoon - it won't properly come together until you mash it up with your glove-wearing hands.

8. now massage your cabbage one last time before dumping it into a colander and rinsing, rinsing, rinsing. make sure to rinse several times and be sure to rinse every piece. put the cabbage into a non-reactive bowl big enough to mix in.

9. dry your hands really good and put your gloves on. mash the kimchi paste with your hands and really mix it up together.

10. grab a nice handful of kimchi paste and start rubbing it through your cabbage leaves. repeat this until you are out of kimchi paste and all of the cabbage has been rubbed with the paste. just smash your hands in there like you were mixing a salad or kneading bread.

11. now take small handfuls of your cabbage and drop them in the jar. with every handful, push down with your hand, or if your hand is too big to fit in the jar use a large wooden spoon. press down as hard as you can. you will notice that the cabbage is now releasing juice and that's a good thing!

12. keep adding handfuls to the jar, pressing as hard as you can to release the juice and get rid of air bubbles.

13. fill the jar to one inch head space, wipe the outside and inside rim with a damp cloth and put the lid on.

you can eat this kimchi right away and it is delicious! or you can let it sit at room temperature for 3 days in order to ferment a little more. we always eat a big forkful right before we put the lid on and then let it sit for 1 day.

i swear this is the best-tasting kimchi out there. and i do know my kimchi. i love it with the cabbage and it keeps so crisp and fresh - yummeh! the other great thing is that cabbage is cheap whereas nappa is expensive. cabbage keeps much longer than nappa as well.

anyway,  i hope that you enjoy!
--------------
UPDATE:

here is a pic of the korean red pepper powder that is traditionally used in making kimchi:


this is the front of the bag. the korean reads:  HAE CHAN DEUL, KO CHA(S) KA RU, which basically translated is, the name of the company is HAE CHAN DEUL, and KO CHA(S) KA RU, is exactly translated as red pepper powder.

here is the back of the bag:


as you can see, from the pictures on the bag, the powder is made from a cross between a jalapeno and cayenne pepper. apparently you can not order the seeds for these peppers from Korea due to some strange embargo or something. but you can order red pepper powder over the internet from a variety of places. just look up korean red pepper powder on the net.

Monday, June 16, 2014

homemade hot sauce!

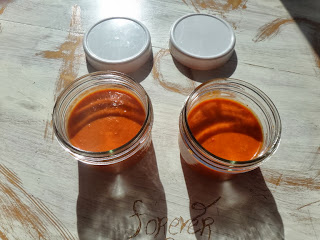
 here is my version of homemade hot sauce:


Ingredients:
(depending on how hot or sweet you want your sauce, you can use a variety of peppers - these ones were freshly-picked off the vine)

3 big bomb peppers, sliced (you can keep the seeds in or remove them, we keep them in for added taste)
2 sweet italian peppers, sliced
5 cayenne peppers, sliced
1/2 a medium white, sweet onion thinly sliced
4-5 garlic cloves (we probably used 10 but we love garlic!)
2 cups of water
1 cup of white vinegar
1 teaspoon of olive oil
sea salt and fresh-cracked pepper to taste

Steps:

1. sautee the peppers in the olive oil with onion and garlic for about 4-5 minutes. 

2. add the water.


3. keep cooking on medium-high heat until you have cooked off the majority of the water.

4. cool the peppers to room temperature, and once cooled, puree them in the blender.

5. add the vinegar as you are pureeing.


6. puree until smooth if you like a smooth, liquidy sauce, or just chop if you like a chunky sauce.

Notes - you can add/substitute tabasco and/or serrano chilies to make the sauce hotter, or jalapeno peppers.
To make the sauce sweeter, add more italian peppers and less hot peppers. To make the sauce more vinegary, add a little more vinegar.

This recipe is a base recipe - once you make it, you can figure out your own way to tweak it to your liking!

Mike - i am sure that you can make this sauce with either dried or freeze-dried peppers. You'll have to give it a test try and let us know what you used and how it turns out!

Saturday, June 7, 2014

i looove gwak-a-mole!

(h/t to poor Joan Jett for what i have done to her song. Ms. Jett - i apologize...but just can't help myself!)

(sung to the tune of "i love rock 'n roll" - by the great Joan Jett)

"i love gwak-a-mole
so put another dime in the jukebox baby
i love gwak-a-mole
so come and take your time and dance with me - YA!"

i love pronouncing words in english phonetically! i know that "guacamole" is properly pronounced "gwa-ka-mol-ee", but i just can't help myself...being a trained linguist and all.


you can serve guacamole on a fancy platter with salsa, toasted greek pita chips, some mango and additional lemon and limes for added punch....or you can drop dollops of the stuff on your loaded nachos!


with fresh-made guacamole you can dip chips in, crackers, all kinds of veg - the possibilities are endless. and if you aren't making your own guacamole...well, all i can say is shame on you. and i mean it. shame on you.

here's some awesome-kick-you-into-next-week guacamole. give it a try!

Ingredients:

2 nicely-ripened avocados (they should be firm, but a  little softish to the touch)
8 million garlic cloves (ok - maybe 4-6 for normal people, but we loooove garlic)
2 or 3 big, heaping spoons of greek yoghurt
the juice of half of a lime
a big dash of cumin
a big dash of cayenne (or lay off it you don't like it too spicy!)
a big dash of turmeric
sea salt and fresh-cracked black pepper

Directions:

1. Cut your avocados in half and scoop out the pits. BIG SECRET: suck the avocado off of the pits - it will be messy! then rinse them nice and clean! and set them aside!

2. Scoop the 2 sides of the avocados into a bowl. Mash the avocado with a fork - i like mine chunky so i don't mash it too much. if you like a smoother guacamole - mash it up quite a bit. you can use a potatoe masher if you like.

3. Crush the garlic cloves into the avocado mash.

4. Add the lime and all of the spices.

5. Splooch in how much greek yoghurt that you would like.

6. Stir and mash all of this together and now here's another BIG SECRET: once you are satisfied with the taste - drop the avocado pits into the centre of the bowl/container. having the pits in the bowl/container helps keep the guacamole from going brown too fast.

7. Refrigerate for at least one half hour before serving to let all of the flavours mingle.

Notes:

Yes, i know that some tried and true Mexican and/or other recipes call for adding tomatoes, onions, chives - you name it. But, i always serve guacamole WITH home-made salsa, so tomatoes, onions and chives are already covered by the salsa. It's up to you to add or subtract to this recipe. Like all recipes - it's all about tweaking until it's right for you.

i hope that you enjoy. but anyway...

"i love gwak-a-mole
so put another dime in the jukebox baby...."

(try getting that song out of your head for the next, say, day, day and a half - bahahahahah! your welcome!)

Thursday, June 5, 2014

Hollandaise sauce!

one of my favourite breakfast treats is hollandaise sauce on poached eggs on toast - yummeh!


here is my simple, yet delicious, tried and true hollandaise sauce recipe (and i have tried many over the years!!!!):

Ingredients:

1/2 cup of butter
3 large egg yolks, separated from the whites
1 Tablespoon plus one teaspoon of freshly-squeezed lemon juice
1/8 teaspoon of salt
a dash of cayenne pepper
a splooch of hot sauce (we use home-made but you can use Frank's or any other kind, and use as much as you want)
2 Tablespoons of hot water
freshly-cracked black pepper to taste

Garnish:
fresh-picked chives

Directions:

1. Heat the butter in a heavy saucepan, on low-medium heat, until hot and foamy - stay on it - don't let it brown at all.
2. In a bowl, whisk the egg yolks with lemon juice, salt, pepper, cayenne pepper and hot sauce.
3. Once the butter is frothy, gently whisk it into the egg yolk mixture - not all at once, just a steady, slow stream.
4. Add the water and continue whisking.
5. Return the mixture to the sauce pan and continue whisking over very low heat until slightly thickened.
6. Serve immediately or let stand over a bowl/pot of hot water for no longer than 30 minutes.

This hollandaise sauce is delicious! i love mine on poached eggs on toast...but as is pictured we also serve it over steamed broccoli and/or asparagus and/or any vegetable that you would like. Enjoy!

Thursday, May 22, 2014

beef liver pate

beef liver pate....on toasted onion bagels - yummeh!


i make my beef liver pate a little different than other recipes i have seen...but i created this recipe by tweaking my mother's recipe with a few other recipes. i hope that you will enjoy it!

Beef Liver Pate
(you can substitute lamb, pork or chicken in this recipe....or make a combination of one or several. it's all up to you!)

Ingredients:

2 large pieces of beef liver (or 4 small ones), already cooked and chopped into pieces
1 large onion, sliced into thin slices
1/2 cup of red wine
4 garlic cloves (i use about 6 because we really like garlic!)
1/3 cup of softened butter
2 tablespoons of butter
1 teaspoon of dijon mustard
several sprigs of fresh rosemary with the leaves pulled from the stem
several sprigs of fresh thyme
1 tablespoon of lemon juice
salt and pepper to taste.

Instructions:

1. In a saucepan, over low-medium heat, add 2 tablespoons of butter. Once the butter is melted, toss in your onion slices. Stir them around to get them coated with butter. Add salt and pepper.

2. Get all of your other ingredients prepared, while stirring the onions every few minutes. Let the onions cook for a good 15 mins, you want them browned and carmelized. If they are browning too fast, lower the heat. Do not worry about any brown bits on the bottom of the pan, they will be deglazed when the wine is added and add much flavour.

3. Remove 1/3 of the onions from the pan to a plate.

4. Next, pour in the wine, the crushed garlic, mustard, herbs, liver pieces and lemon juice. Turn the heat up a little and keep stirring to deglaze the pan. Let most of the wine evaporate. Set aside the pan to cool to room temperature.

5. Using another smaller pan, set the heat to low and return the 1/3 of onions that you set aside to this pan. Do not add any more butter as they will be butter-soaked. Cook them until crinkly brown and set them aside on a paper towel to dry off. You want them crinkly and crisp.

6. Once the pan of wine, liver, etc. is cooled, pour the mixture into your food processor and add the 1/3 cup of softened butter. Chop, blend and puree until you are happy with the consistency.

7. Spread on bagels, crackers, toast - whatever! Top with the crispy onions and Enjoy!

Thursday, April 17, 2014

nasturtium spice!

have you ever eaten a fresh nasturtium flower? they are so delicious! and spicey and peppery! they are excellent in salads or sandwiches.

here's a pretty little nasturtium:


they come in all different colours - red, orange, yellow and beige.


lots of people pick them fresh and add them to various food. but when you have a ton of them and you want that spicey, peppery taste to add to your food over the winter - you pick them and dry them! after you pick them, rinse them thoroughly. then give them a quick pat dry with a towel. then lay them on a screen, if you have one laying around (we have 20 million because jambaloney is a really good garbage picker!)


you could use a dehydrator or an oven...but heck, we have the good fortune to have a porch wrapped in plastic! it gets so hot out there on sunny days that it takes no time to dry the flowers!

make sure that the flowers are completely dry...and brittle....like this:


once you have gathered enough, stick them in a blender or anything that will chop them really fine to make a powder.


and there's your nasturtium spice!


you can add it to soups, stews, salads, dressings - whatever! it has a very delicious, lightly-spicey taste when it has been turned into powder. we love the stuff!!!

Saturday, March 29, 2014

a very basic, but nutritious and healthy, salad dressing - you can put it on anything!

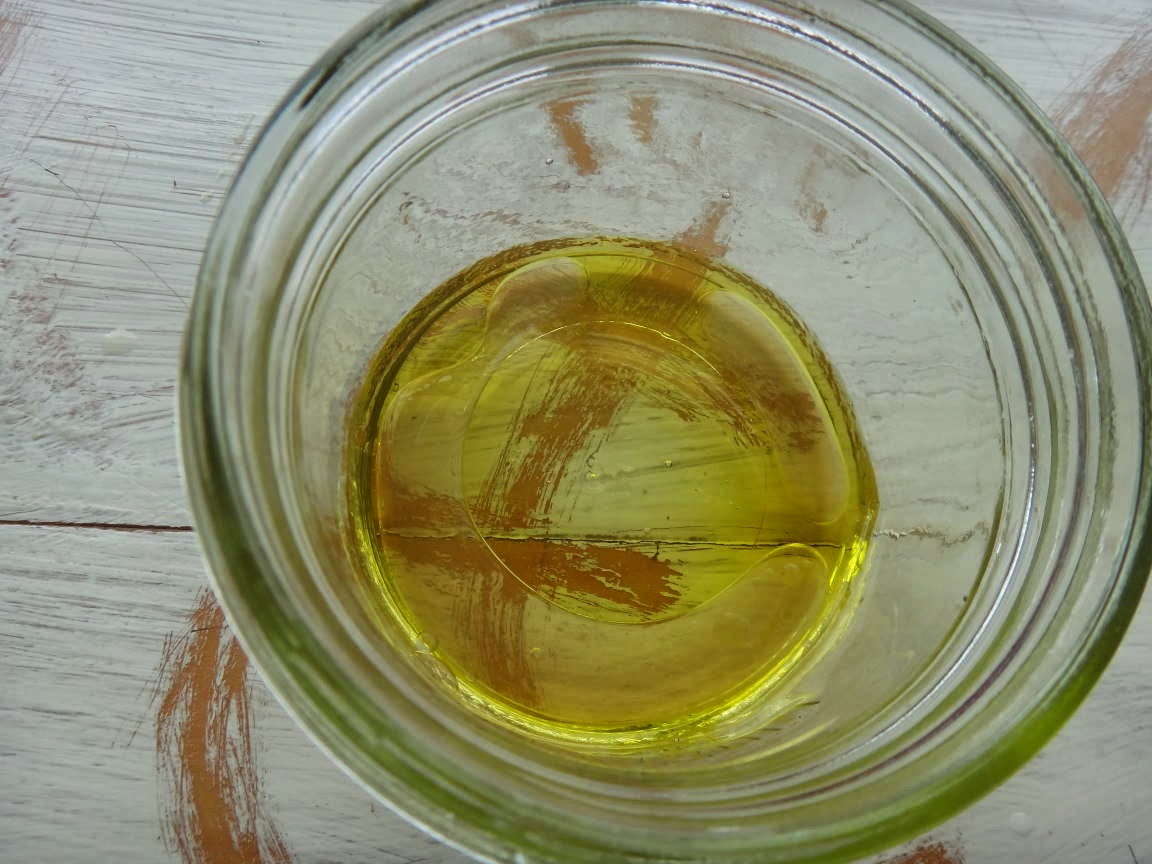
it starts with about 20 swirls of olive oil.


next you dump in about a tablespoon of apple cider vinegar WITH the Mother in it.


next up is sea salt and freshly-cracked black pepper to taste.


a good pinch each of cayenne, turmeric and cumin.


3-4 cloves of garlic, a good-sized knob of ginger and a plop of unpasteurized honey.


a half of a lemon, or lime, squeezed in.


then you shake that baby up real good.


then you dump it on your salad.


the salad above is chiffonade romaine lettuce, tomatoe, cucumber, kiwi, orange, olives, feta and homegrown sprouts.

this salad below is iceburg lettuce, quinoa, 4 different-coloured peppers, broccoli, olives and feta.


and this is a bean salad with romaine lettuce, chickpeas, kidney beans, and 4 different-coloured peppers with cucumber.


this salad dressing can be put on anything - i even put it on fruit salad! it is not only delicious and healthy, the combination of garlic, vinegar with the mother, ginger and honey, all in conjunction, become a natural antibiotic. turmeric, cayenne and cumin are very good for your digestive system and for your overall health. if you eat this dressing every day, which we try to do, it will increase your overall health. you can also put this salad dressing on sardines - it tastes divine. and all of you better be eating a can of sardines at least once a week! i mean it! if not, i will have to come visit you and kick yer butt! and none of you want that! bahahahahhah!

please make this dressing, and make it to your taste. but don't leave any ingredient out. all of the ingredients are essential to maintaining good overall health!

Monday, March 24, 2014

braised wild rabbit - yummeh!

there is nothing on the planet more nutritious and delicious than wild, local food that you hunt and prepare for yourself - NOTHING! here on our island we have access to lobster, shrimp, mussels, clams, a wide variety of fish, pheasant, geese, duck, rabbit, deer and moose. i am sure that i am forgetting something, but trust me, we have access to this lovely wild food. and we are very grateful. my husband keeps us in beautiful trout during trout fishing season and friends of ours, who work the lobster and/or crab boats keep us supplied, we go "clamming" for clams and mussels, and several of our friends hunt (my hubby will start next year) during hunting season. a friend of ours recently gifted us with 8 wild rabbits that he snared himself on his own land. he also gutted and prepped them beautifully for us.

this recipe will work on wild rabbit, home-grown rabbit or store-bought rabbit.

a bit of back-info before we get to the recipe. in my opinion, whether you are roasting, braising or cooking meat in the crockpot - the VERY FIRST THING that you must do is to carmelize some onion in a pan with butter and EVOO. carmelize the onion on medium heat until it starts to soften and brown and then add in some carrot and celery and let those carmelize too! they will provide the base of any meat that you are cooking.

the next thing to mention is that when you are roasting, braising or cooking meat in a crockpot - please use broth/stock and not water! i am a big believer in making your own stock/broth as it is so simple - but at the very least, use store-bought stock/broth if you must. just not water! bleck!

ok, on to the recipe. which is more of a guideline. i have a penchant for blogs that write out the steps and explain what and why, and not just provide a recipe.

so, you have caramelized your onion, celery and carrot. remove these to a plate/pan/whatever. and the oil/butter that was in the pan is nice and browned and might even have brown bits in it. LEAVE THOSE THERE - they add flavour. next, you are going to take your rabbit and kind of split him in half using only your hands. just lay him on his back, bend his back legs away from his body, bend his front legs away from his body, and then press down near the spine. you might break the spine, no prob, but what you want is to flay the rabbit out as flat as possible. next you season your rabbit with salt, pepper, rosemary, sage, thyme - whatever seasonings you like. then you add more butter and EVOO to the pan that you cooked the onions, celery and carrot in and you place the rabbit down on his front-side or back-side. braise the one side for a few minutes until you see some colour, and then braise the other side. now add your rabbit to your roaster and sprinkle the onion, carrot celery all around. like this.


set your oven to 325.

next up - dump about 2 cups of stock/broth (hopefully home-made - it makes all the difference!) into the cooking pan. on medium heat, let it come up to a boil and scrape the bottom of the pan. this will bring up all the tasty brown stuff on the bottom and your pan will be clean and shiny when you are done. dump this over the rabbit and veg in the roaster. it should come halfway up the rabbit depending on what size roaster you use and depending on how much broth you want left over for sauce or gravy.

cover the roasting pan and cook for anywhere between 3-4hrs depending on the size of your rabbit. the longer you leave it in, the more tender the meat becomes and the more the flavours are able to mingle. after 90-100 mins, flip the rabbit and continue cooking for the remainder of the time.

once the rabbit is ready, remove it from the pan (don't be alarmed that the meat will fall right off the bones, strain your broth into another pan and either serve this as a sauce or make a gravy out of it. i always make a gravy.

here is my finished braised rabbit, served with wild rice, mushroom and cranberries.


i hope you enjoy this recipe. if you have any questions, just leave them in the comments.

Monday, March 10, 2014

greek yoghurt dip/spread

this is a favourite dip/spread to have on hand at all times. it's good as a spread for sandwiches, wraps. veggies, baked pita chips, crackers or whatever!


Ingredients:

1 tub of greek yogurt
a 1inch chunk of cucumber
2 cloves of garlic (i use 4)
a squeeze of lemon juice
fresh-chopped, or dehydrated chives
a pinch of cumin
a pinch of cayenne
a pinch of turmeric
sea salt and fresh-cracked pepper to taste

Directions:

1. empty yoghurt into a mixing bowl. using a garlic press, press the cucumber into the yoghurt. use the garlic press to add the garlic. squeeze a quarter of a lemon into the bowl. toss in the chives and the spices. mix it all together. taste. adjust for seasonings.

we love this on pita with lettuce, herbed lebanese rice and hot peppers.


we also love it on wraps with stir-fried onions, peppers and avocado.


and again, you can use it as a dip for veggies, pita chips, crackers, etc.
no matter - it's deelish!

Saturday, March 1, 2014

bean, chickpea and veg salad that even a man would eat!

as you all know - we love fresh and healthy food! here is a really yummy, and very filling salad. you can eat it for breakfast, dinner, supper or snack. it's always good to make a ton of it so that you snack on it for several days!!!


Kidney Bean, chickpea and veg salad

Ingredients:
(you can use whatever you have on hand!)

1 can of chickpeas (i prefer to use dried and soak them overnight but cheated using a can with this salad!)
1 can of kidney beans (same as above!)
green pepper, red pepper, orange pepper and yellow pepper, chopped (or any one, or any combination of)
1 small jar of artichoke hearts in oil, chopped - don't skip these - they are truly a delicious addition

Ingredients for the dressing:

8 or 9 swirls of olive oil
a good dollop of apple cider vinegar
the juice of half a lemon
salt and pepper to taste
as much, or as little garlic as you like, crushed (we use a ton)
a knob of ginger, crushed
big pinch of turmeric
pinch of cayenne
pinch of cumin

Steps for the salad:

1. drain your chickpeas and kidney beans. dump them in a big bowl.
2. add your chopped peppers.
3. add your chopped artichokes

Steps for the dressing:

1. dump all of the ingredients in a jar and shake, shake, shake.

To assemble:

1. dump the dressing all over your salad. make sure the salad is in a bowl/container with a lid. put lid on and shake, shake, shake. add more salt and pepper, to taste. bring bowl/container out into the snow and bury it in the snow for a good hour. or you could use your refrigerator. the snow works better, tho! lastly, chop up some romaine, iceberg or bib lettuce - whatever you have on hand and serve the bean salad over it. don't forget to add some home-grown sprouts and some slices of cucumber.

deelish. and filling. even better after it has sat a day or two. enjoy!


Wednesday, February 26, 2014

herbed lebanese rice

this is one of our favourite, easy-to-prepare and really delicious suppers. the leftovers can be used in a variety of ways!


for supper, we normally serve it with heated pita, cucumber sauce and of course kimchi! a lemon slice squeezed on the rice doesn' hurt either!

INGREDIENTS and steps

Lean ground beef
Worcestershire sauce (as much as you like)
2-3 cloves of garlic (depending on how garlicky you like your food and depending on how much hamburger you are using. I tend to throw 4-5-6 cloves in!!! but we looove garlic! And we’ve never been attacked by a vampire...might be on to something there – bahahaha!)
Finely chopped onion (however much you like)
Sea salt and fresh cracked pepper to taste
As much cumin as you like
As much turmeric as you like
As much cayenne as you like
(maybe a ¼ teaspoon of each??? I think i use closer to half a teaspoon of each but we like it really spicey!)
A ton of fresh-chopped parsley
Cooked rice

  1. bring your ground beef to room temperature – take it out and put it in a bowl with a lid for about half an hour before you intend to cook it.
  2. dump Worcestershire sauce all over your hamburger, break it up into pieces and dump some more. Mix it all around, trying not to stir it up too much.
  3. use your garlic crusher and crush your garlic into your meat.
  4. add your chopped onion.
  5. add your sea salt and pepper.
  6. add your cumin, turmeric and cayenne – i just sprinkle it all around the meat until i feel i’ve used enough.
  7. mix it all together, try not to stir it too much. put the lid on and let sit at room temperature for 20-30 minutes (depends on time of year and how warm it is in the house).
  8. after the meat has sat, cook it over medium-high heat, stirring it around and breaking it up. It will release a lot of liquid due to the Worcestershire sauce, but that is a good thing as it almost makes a sauce and all of the spices are in that sauce.
  9. cook off the majority of the sauce and then either strain the meat or not. I don’t strain as i like for some of the greasy sauce to mix with the rice.
  10. when the hamburger is cooked throw your chopped fresh parsley into it and mix it around. Now throw your cooked rice in, stir it all around and serve!

Thursday, February 20, 2014

the Framboise Manor guide to home-made veg broth

this post is for my friend Sue. we have been talking back and forth about making broth and i thought i would post the way that we do it here, for her. (that and the fact that i have not been maintaining this blog at all! i want to - and know that there will be a time when we aren't up to our eyeballs doing a million of other things - and i really like using a blog to collect recipes! all of this to say that i will be trying to keep up to date with this blog!)

this is not so much of a recipe as it is a how-to guide and it is the way that we make all of our home-made broth. there are millions of recipes and whatnot but i thought i would share "our way" and if any of you are interested - then that's awesome!

first off - because we don't have chickens or other animals that would gladly eat the tops of carrots or veggies about to go off - i save all of the cleaned trimmings, skins, peels, etc. from all of our veggies. i store these in a freezer bag and add to it daily. i also grab any veg/fruit that is about to go off and store those in the freezer bags as well. these will be used to make the broth. whenever i plan on making broth, i always make sure to have fresh celery, onion and carrot as these fresh veggies will really make the flavour in the broth with the frozen ones adding water from their melting, and a deepening flavour.


i start with a big giant pot on my tiny stove. i get the bottom nice and hot and then i swirl olive oil 4 or 5 times to semi-coat the bottom and throw in a good heaping spoon of butter (if you are concerned about fat content or whatnot, you can leave out the butter. but the butter to me is what truly makes a good broth!). i chop up 2 fresh onions into 6-8 wedges and toss those into the butter. i clean the carrots but i do not peel them. i also leave the tops and bottoms on. i chop about 6 of those in half and toss those in to the pot. i clean a few stalks of fresh celery and chop them in half and toss them in the pot. i then liberally add sea salt and fresh cracked pepper. you can leave out the salt if you desire, but i believe that the salt really helps with the flavour. i stir these veggies and let them cook until they start to brown. once browned, i add 2 cups of filtered rainwater. i turn the heat down to medium.


next, i dump a bag or two of a variety of frozen veggies from my saved stash in. you could skip this step by adding more fresh veggies in the beginning. next i toss in 10-12 pieces of garlic. i smash the garlic with the back of the knife but i don't crush it or chop it - you don't need to. next i add a big splash of vinegar with the mother in it and a heaping teaspoon of unpasteurized honey. give all of this a nice stir, and help the frozen veggies melt. now it's on to spices.


i throw every spice i have in to the pot. i just take a pinch of everything using my fingers. i throw in 8-10 bay leaves, pinch of rosemary, thyme, turmeric, curry powder, cinnamon, cumin, cilantro/coriander, chili powder, cayenne, paprika, sage, oregano, and some more sea salt and cracked pepper. i bring the pot up to a boil, and once at a boil, put a lid on and set the heat to medium-low, just to keep the pot at a simmer. i check the pot quite regularly, give it a stir and keep it at a simmer. after an hour or so, all of the frozen veggies should be melted. at this point i add as much water as needed to fill the pot, bring it back to a boil, put the lid back on and bring the heat down to a simmer again.

then i leave it at a simmer for 6 or 8 or 10 hours, constantly checking it, stirring it, etc. once the set amount of time has passed, i spoon out as much vegetables as i can and let the soup cool. once cooled, i line a colander with some paper towel and pour out the broth into another big bowl or pot. once the liquid is fully cooled, i pour it into a variety of sized containers and freeze it. this will be the base for your poultry and beef broth.

i usually make a beef or poultry broth the very next day and save 4 cups of the veggie stock in the fridge to do so. i start the pot with the same olive oil, butter, and fresh onion, celery and carrot stir fry. once the veggies have browned, i add the 4 cups of veggie broth that i saved in the fridge. then i throw in some more of the frozen saved veggie pieces. in the case of poultry broth, i throw in at least 2 frozen carcasses, all of the wing/leg bones, any remaining meat, all of the fat, etc. i find that the best poultry or beef broth starts with a good veggie broth as the base. in the case of a beef broth, i throw in frozen bones from roasts, steaks, all the fat, any remaining bits of meat, etc. i melt the frozen carcasses/bones on medium heat and after about an hour they and the veggies should be melted. at this point i add as much filtered rainwater as is needed to fill the pot. i then throw in pinches of all of the spices that i used to make the veggie broth above. i bring the pot to a boil, put a lid on it and let it simmer all day, checking it and stirring it regularly.


after 6 or 8 or 10 hours has passed, i remove all of the carcasses/bones etc with a slotted spoon. then i let the broth cool. once cooled a little, i line a colander with paper towel and pour into another big pot or bowl. this step is CRUCIAL to getting the gelatinous goopy fat out of your broth. put into a variety of containers and once completely cooled, put in the freezer. or can your broth - it's up to you!

i hope that this guide has been helpful. if anyone has any questions, please don't hesitate to ask them!

SPROUTS - not so much of a recipe but whateva!


Sprouts eh? Yes sprouts. There are lots of interesting facts about sprouts:

"Seeds and grains contain a wonderful store of nutrients and are an excellent source of enzymes. Nature has protected the enzymes in dry seeds, nuts, grains and legumes by placing enzyme inhibitors in them. Enzyme inhibitors prevent the enzymes from being activated until the seed is germinated. Unfortunately this also prevents us from receiving the benefit of the plant enzymes to aid us in the digestion of the seeds. Germination neutralizes the inhibitors and releases the enzymes. Many people are sensitive to these inhibitors and display allergic reactions such as headaches. Some have difficulty digesting the seeds and nuts, grains or legumes and suffer indigestion. These digestive problems can be prevented by soaking the dry seed and beginning the germination process. Sprouting makes the vital enzymes fully available for our body's use and eliminates the possibility of allergic reactions to the enzyme inhibitors.

Many seeds also contain phytic acid which significantly reduces the absorption of calcium, iron, zinc and other minerals into the blood stream causing loss of important minerals. When the seeds are sprouted, such losses become insignificant. Several other important functions are served in sprouting. The nutritional value is greatly enhanced, even quadrupled in many cases. In addition, starches and proteins are converted into simple sugars and amino acids which are much more easily absorbed and utilized by the body. In the case of nuts and seeds, the fat content is reduced by as much as 30-40% as it is consumed or energy in growing the sprout or converted into fatty acids.
The high concentration of vitamins, minerals and amino acids (proteins), RNA and DNA in sprouted foods have a regenerative effect on the human body. This concentrated combination of nutrients is available only in the live cell food." (http://www.homeopathyone.com/live_sprouted_foods.htm)
The sprouter that we use, year-round, is an EasyGreen Automatic Sprouter.


as you can see, this sprouter has 5 trays, an automatic timer for the mister and the ability to mix and match your sprouts. some sprouts take 4-7 days, some a little longer.


here's a pic of about $40 worth of sprouts that lasted for almost 3yrs. that is some cheap, delicious food!


The EasyGreen sprouter is pretty expensive – however, if you are interested in purchasing an automatic sprouting machine – we highly recommend it! There are other smaller, automatic types out there as well – such as this one - and non-automatic models such as this one - . Those are just a few examples – I have done some searching on the net for sprouters and there are a bazillion different kinds – and in all price ranges.

What’s even better though is that I found a bazillion sites that talk about growing sprouts in mason jars! I like DIY’ers who figure out ways to do things on the cheap! Go here , or here, or here for more information. Just google sprouts and mason jars and you will find many, many more sites out there that can teach you the step-by-step basics of growing your own sprouts in mason jars – I haven’t tried it in mason jars but there are so many people out there doing it – it can’t be that hard right?

and sprouts are just so very good for you! ok - this IS a recipe blog so i will leave you with a few recipes:

Recipe 1: toss them on every salad you make.
Recipe 2: toss them on every sandwich you make.
Recipe 3: toss them onto a bowl of soup after you have served it - that way they keep their crunch. or throw all caution to the wind and toss them into the soup as you are cooking it.
Recipe 4: toss them onto stew, or into stew.
Recipe 5: eat them by the handful.
Recipe 6: make yourself a nice snack plate of cheese, kimchi, some crackers, some apple and, get ready for it - toss the sprouts on your plate.

you can get really crazy and put them in your ice-cream or bake a sprout pie - but hey - get creative! and get yourself some sprouts!!!

Wednesday, February 19, 2014

hot/sour/sweet dressing or dipping sauce

this delicious dressing/dipping sauce is filled with goodness and will belt you in the head! so if you like stuff that belts you in the head - this one is a winner!

the salad pictured below is romaine chiffonade, frozen peas that are just barely thawed, cucumber, shrimp, blood oranges, fresh homegrown sprouts and the hot/sour/sweet dressing.


kymberz hot/sour/sweet dressing:

Ingredients:

1/2 cup of freshly squeezed lime juice
1/4 cup of organic sugar
3 tablespoons of fermented fish sauce
2 tablespoons of unseasoned rice wine vinegar
2 tablespoons of chopped fresh cilantro
2 garlic cloves (i always use 4 - we love garlic!)
1 tablespoon of homemade hot sauce (or store-bought)
1 jalapeno pepper with seeds, minced finely (if you don't have a jalapeno, you can probably substitute with canned jalepeno chopped finely, or red pepper flakes)

1. put all of the ingredients in a jar and shake until the sugar dissolves. put in the fridge for at least an hour to get a nice chill (when i made this the other day, i just put the jar out in the snow - bahahahah!)

this dressing can be used on any kind of salad of your choice. it is also great as a dipping sauce for vietnamese spring rolls or rice paper rolls. when i use it as a dipping sauce i always include a good handful of chopped up green onions.

enjoy! and if you have any questions - just leave them in the comments section.

Sunday, February 16, 2014

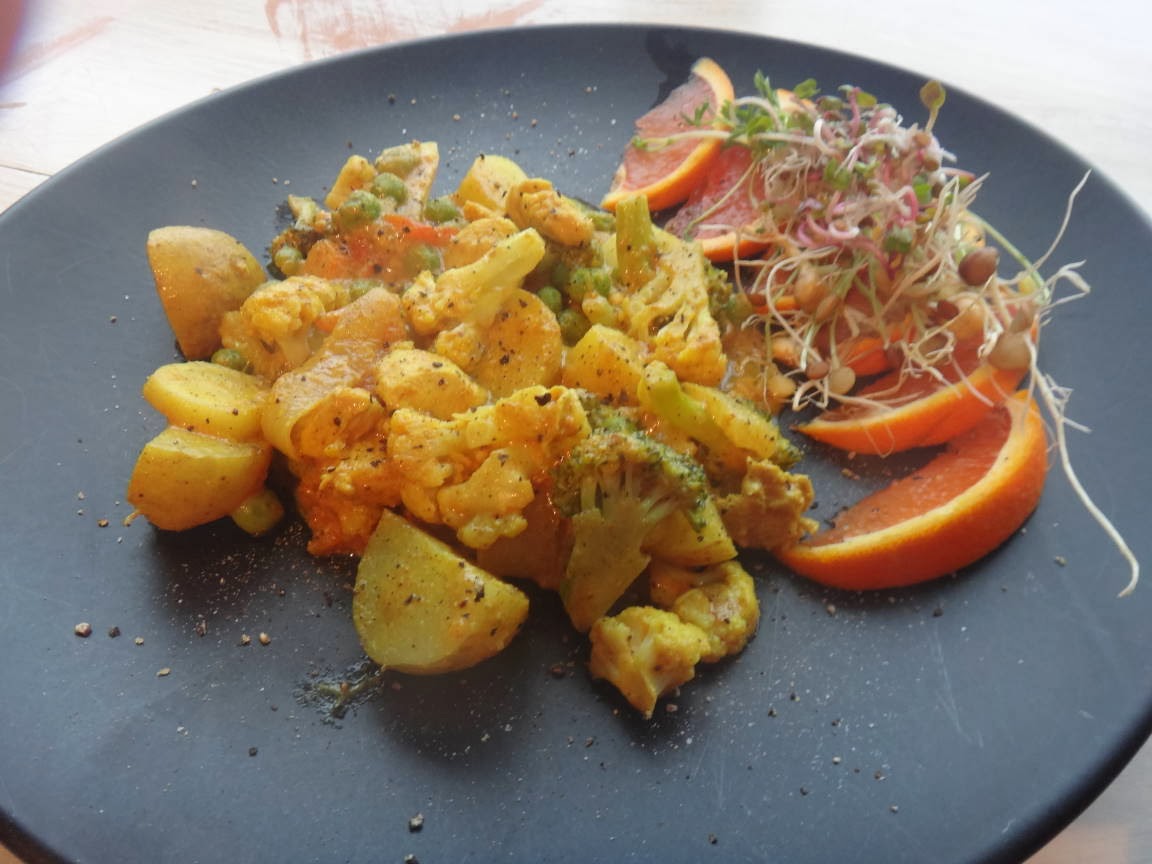
kymberz chicken and veg curry!

this curry is a combination of a few recipes that i have played with and tweaked over the years. it is full of flavourful spices, but it isn't hot! you can make it hotter by adding hot sauce if you like! you can also add whichever vegetables you have on hand, and they can be fresh or frozen!


Ingredients for the curry paste:

2 cups of plain yogurt - you can use fat-free but where is the fun in that?!?!?
1, 2, 3 or 4 chicken breasts, depending on how much chicken you want in there. for this recipe i used one large chicken breast, chopped up into bite-size pieces
4tsp of curry powder
2tsp ground coriander
1tsp cayenne pepper (or more if you like it hotter)
1tsp cumin
1tsp turmeric (i use 2 tspns because turmeric is so good for you!)
oil as needed for sauteeing the veg below (you can use EVOO, almond or get crazy like i did and use walnut oil - it adds a nice nutty flavour!)
the juice of half a lemon
4 garlic cloves (i used 6 big ones because we love garlic!), crushed
a big knob of fresh ginger, crushed
a nice dash of salt and pepper

Step 1: combine all of the above ingredients in a big bowl. it should look a little something like this:


2. Mix it all together and dump your cubed chicken in and be sure to coat all of the chicken.


3. Set the chicken aside and let it marinate at room temperature for about 20 minutes. while you are waiting on the chicken - prepare your veg ingredients.

the list of veg ingredients will vary depending on what veg you have on hand. my list of veg ingredients follows:

half a chopped fresh onion
a nice handful of chopped fresh broccoli
a nice handful of chopped fresh cauliflower
a handful of orange and white carrots (from our garden)
2 handfuls of irish cobbler potatoes chopped into cubes (from our garden - woohoo!)
2 fresh tomatoes, chopped and keep all of the juices and seeds
3/4 cup of frozen peas

here's a pic of all of the suspects!


now some people might call me crazy for this next step but trust me that the time and effort is worth it! so....

Step 4: use a high-sided stainless steel sauteeing pan. toss in some oil as needed. as i mentioned, i used walnut oil.

Step 5: once the oil is heated toss in your onion. keep stirring it around until it starts to carmelize and leave some brown bits on the bottom of the pan. remove the cooked onion to a container.

Step 6: another splash of oil in the pan, you'll be able to tell how much you need. you only want to be able to coat the veg and then give them a nice quick sautee.  so now, toss in your carrots. brown them a little and then remove them to a container.

Step 7: more oil. toss in the broccoli and cauliflower. stir them around. coat them in the oil. brown them a little and then remove them.

Step 8: you guessed it! another splash of oil. toss in the potatoes. stir 'em around to coat and let them brown.

Step 9: take the chicken cubes out of the marinade and shake off as much marinade as possible back into the bowl. add more oil to your pan. toss in the marinated chicken. stir it around and don't worry about the beautiful curry sauce that might be sticking to your pan - you want that! when the chicken is cooked through, remove it.

here's a pic of all of the suspects sauteed:

Step 10: throw some oil into the pan. now dump in your chopped tomatoes. stir them around and squish them with whatever utensil you are using. the tomatoes will release a lot of water and juices and by constantly stirring them, you are deglazing the pan of all of the brown bits left by the veg, as well as some of the curry sauce left from the chicken. sorry for the blurry pic!


Step 11: toss the potatoe cubes in with the tomatoes and stir on a med-high temperature - you want to bring the potatoes to a boil. they will need about 5-7 mins in order to become fork-tender. don't overcook them as they will still be cooking for a few more minutes when the other veg are added.

Step 12: once the potatoes are fork tender, toss in all the other veg and the chicken. toss in the frozen peas. let the sauce and veg come up to a boil and then reduce the heat to low and cover for anywhere between 5-15 mins, depending on how crispy you like your veg to be.

and then serve!


i forgot to take a picture of the warmed up pita bread that i also served with this. the pita is good for wiping up the delicious curry sauce. we usually make this for supper and because it is so full of veg, you don't really need to serve it with anything other than a small salad, or in this case, blood oranges and sprouts. there is another meal for dinner (lunch) tomorrow, and then there will be enough left to have served over rice the following day. you can adjust how much you make by halving or doubling the recipe. i don't know if this freezes well or not - we just eat it until it is gone!

i hope that you enjoy this recipe and if you have any questions just ask in the comments!

Wednesday, February 12, 2014

kimchi! (also known around The Manor as "kymberchi"!!!)

we love kimchi. it not only tastes great, punches you in the head with it's kick, and is terrifically wonderful for your stomach flora - it just feels good to eat! kimchi is a traditional dish that koreans eat a ton of, and they eat it with every meal. there are a million different kinds of kimchi, which is simply fermented veggies, but i am providing a traditional kimchi that my korean teacher taught me many moons ago when i was on my korean language training.

this type of kimchi is normally prepared in a ceramic crock and then buried underground for a minimum of 3 months to ferment. sounds crazy but if you have ever had "proper", buried-in-a-crock kimchi - oh man there is nothing like it! and my friend Harry can attest to the fact that if you spill it - there is no smell like it on earth! but man is it deelish!

anyway - when my korean teacher left korea and came to canada with her husband and children - she quickly figured out that she needed to make kimchi regularly for her family as there was no where to buy it (that has since changed! i am glad to say that ottawa has several korean stores and markets and we were able to get really good kimchi all of the years that we lived in ottawa). anyway, i digress. here is the kimchi recipe that my korean teacher taught me. this stuff is awesome!

first off - here's your ingredients: 2 nappa cabbages, several small daikon radishes (or one big one), coarse sea salt (do not use table salt!), korean red pepper flakes, a quarter cup of thai fish sauce (i use 2 of my home-made concentrated fish ice cubes), as many green onions as you like (i like a lot of them in the kimchi), a whole clove of garlic and a big knob of ginger.


cut the bottoms off of your nappa cabbage and then peel each leaf. trim any bad spots. fill a big pot, crock, or as i use, a cleaned and washed cooler. add a cup of coarse sea salt and about a gallon of water. stir the water until the salt has dissolved. place all of your trimmed leaves in the water. use something to make sure that your leaves stay submerged in the salt brine - i use bottles filled with water. 

put your container in a cool, dark place for about 3 hours.

next up - grate your daikon radish. this kimchi is so spicy because the daikon radishes were grown in our garden.


crush all of your cloves of garlic, and your ginger, using a garlic press into a big bowl.


add the grated daikon radish, cup of red pepper flakes and fish sauce.


rinse all of your cabbage leaves and green onion. rinse them 2 or three times. then wrap them in paper towel and a cotton towel - you want the cabbage leaves to be incredibly dry.


make sure to wear rubber gloves as the red pepper flakes burn. trust me. and don't wipe your eyes or nose. trust me.

 take each piece of cabbage and rub it with the sauce. rub it into all of the grooves of the cabbage both front and back. you will feel the cabbage leaf start to wilt. that's good. when the leaf is covered both front and back, fold it up and put it in your glass jar.


keep adding leaves and while doing so, press down as hard as you can so that the leaves start releasing their liquid. you will think that the jar is full and then realize that it is only half-full. you can fit a lot of cabbage leaves folded up like this in a jar.

 leave about a quarter inch of headspace at the top of the jar. keep pressing down on the cabbage as it will continue to shrink down. when you are pretty sure that your jar is full - cap it and put it somewhere cool and dark. i put ours under the bed.


every few hours, shake the jars. really shake them. you will notice that a liquid has now formed and that the cabbage has shrunk down. that's the fermentation part and that is a good thing. if you see bubbles - that's good too. you can let your jar ferment up to a week but i never last past 3 days. once you have decided to end your fermentation phase, put your jar(s) in the fridge. enjoy with every meal. this recipe isn't the crock recipe - if using a crock and the proper crock recipe - the kimchi will keep for a year or longer. this kimchi recipe will keep for about a month in the fridge.

give it a try. it certainly is an acquired taste - but if you acquire a taste for it - you'll want it all the time. i love kimchi!

here's a nice breakfast - zucchini/carrot fritters with sour cream and you guessed it - kimchi! it was awesome!


i hope that you enjoyed this tutorial and hope that you'll make your own kimchi too! it really is good for you!